📋 Forms
Create engaging forms ✨
Quickly gather feedback, collect input from your members, and better understand their needs using the Forms module in Membri.
Forms can be sent to targeted contacts or accounts and allow you to:
- 📝 Ask simple or multiple-choice questions;
- 📈 Get precise feedback;
- ✅ Support data-driven decision-making.
Understand the Forms module
The Forms module allows you to design, send, and track surveys directly within your Membri environment. It’s ideal for collecting data, assessing satisfaction, or consulting your members.
You’ll find three sections in the main menu:
- Forms: create and configure your surveys;
- Form Invitations: manage recipients and send-outs;
- Form Question Responses: view answers and track feedback.
Each form can be customized:
Form settings
| Field | Description |
|---|---|
| Name | Visible title of the form. |
| Description | Supporting text displayed with the form. |
| Expiration date (optional) | Deadline for submitting responses. |
| Number of days to complete the form (optional) | Number of days from invitation to respond. |
| Form invitation template | Templates used for the initial invitation and reminder — customizable. |
| Form reminder template | Templates used for the initial invitation and reminder — customizable. |
Default invitation and reminder templates are set in the environment. They auto-fill based on your form's information, but you can customize them for each send-out.
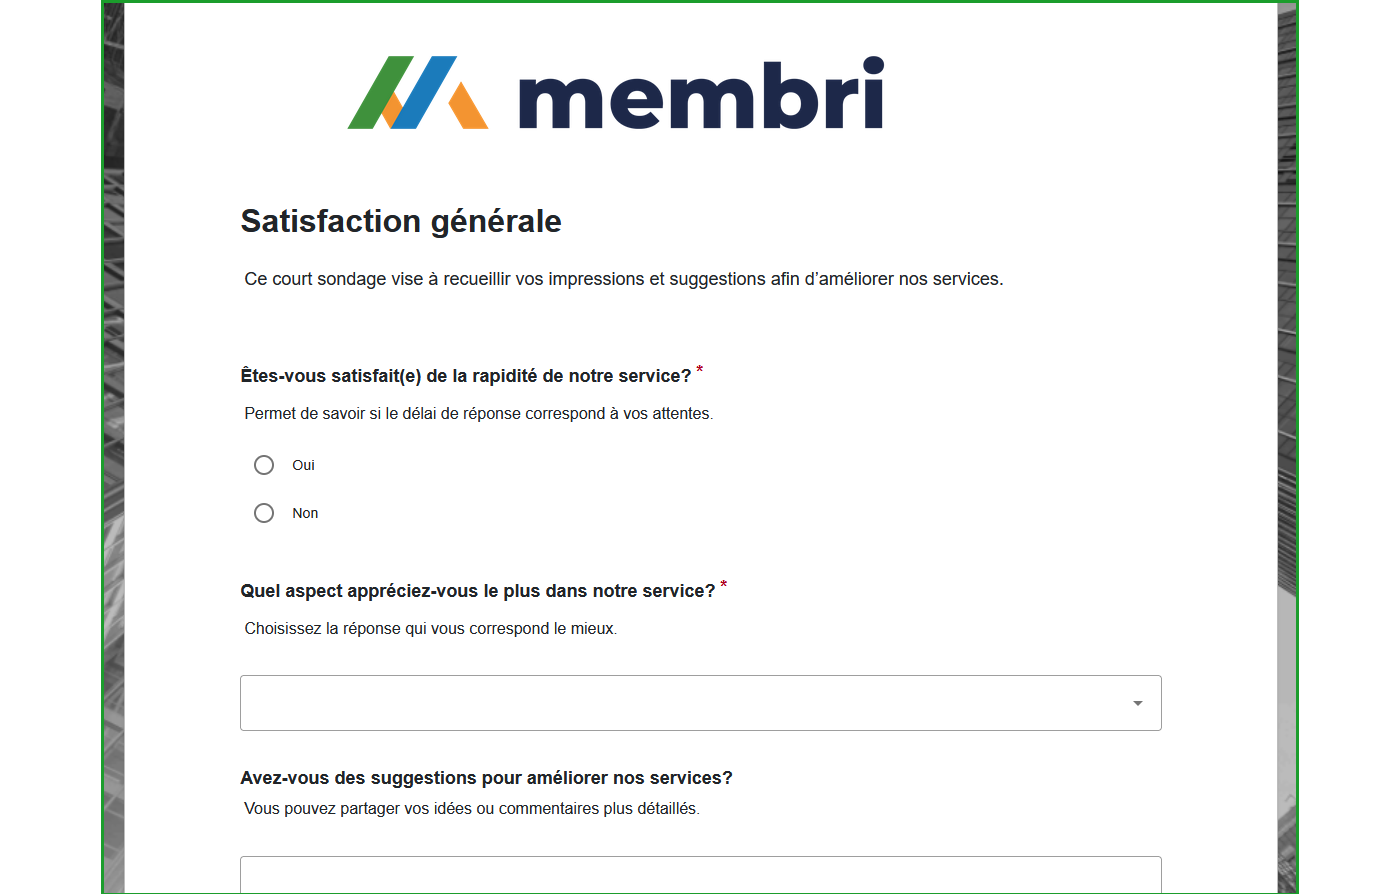
Create a form
The form creation process allows you to design custom questionnaires to easily gather the information you need from your members.
- In the left-hand main menu, select Forms;
- Click the
+ Newbutton in the top toolbar; - Fill out the required fields;
- Save the form.
Once saved, the form will be available in your environment. You can then add questions and manage invitations.
Add questions
You must save your form before you can add questions.
From the form record:
- Open the Form Questions tab;
- Select
+ Create a form question; - Complete the following fields:
| Field | Description |
|---|---|
| Name | Visible name of the question |
| Linked Form | Automatically filled |
| Question Type | Short text, Long text, Yes/No, Single choice, Multiple choice |
| Required | Is the question mandatory? |
| Description | Help text displayed under the question |
| Display Order | Position within the form |
Manage invitations
You must save your form before you can add recipients.
Sending invitations is a two-step process:
- generating the invitations to prepare your follow-ups;
- sending them to the selected recipients.
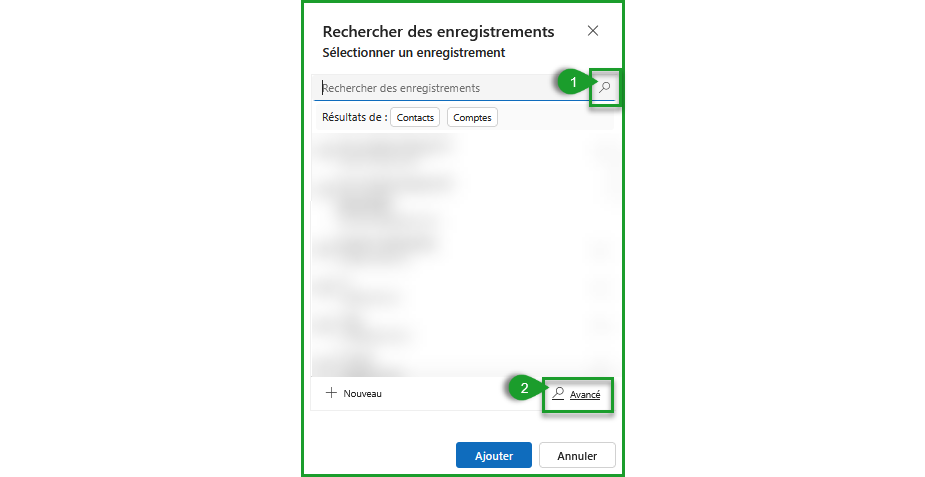
Invitations can target contacts, accounts, or both. To save time and refine your targeting, use the Advanced Find. It allows you to navigate your environment’s views and quickly select the records to include.
From the form record, open the Invitations tab:
- Click the
Generate Invitationsbutton; - Select the targeted contacts or accounts;
- Invitations will appear with the status To send;
- Use:
Send all invitations;- or
Send selected invitations.
Advanced Find allows you to efficiently target the right contacts or accounts using your environment’s views.
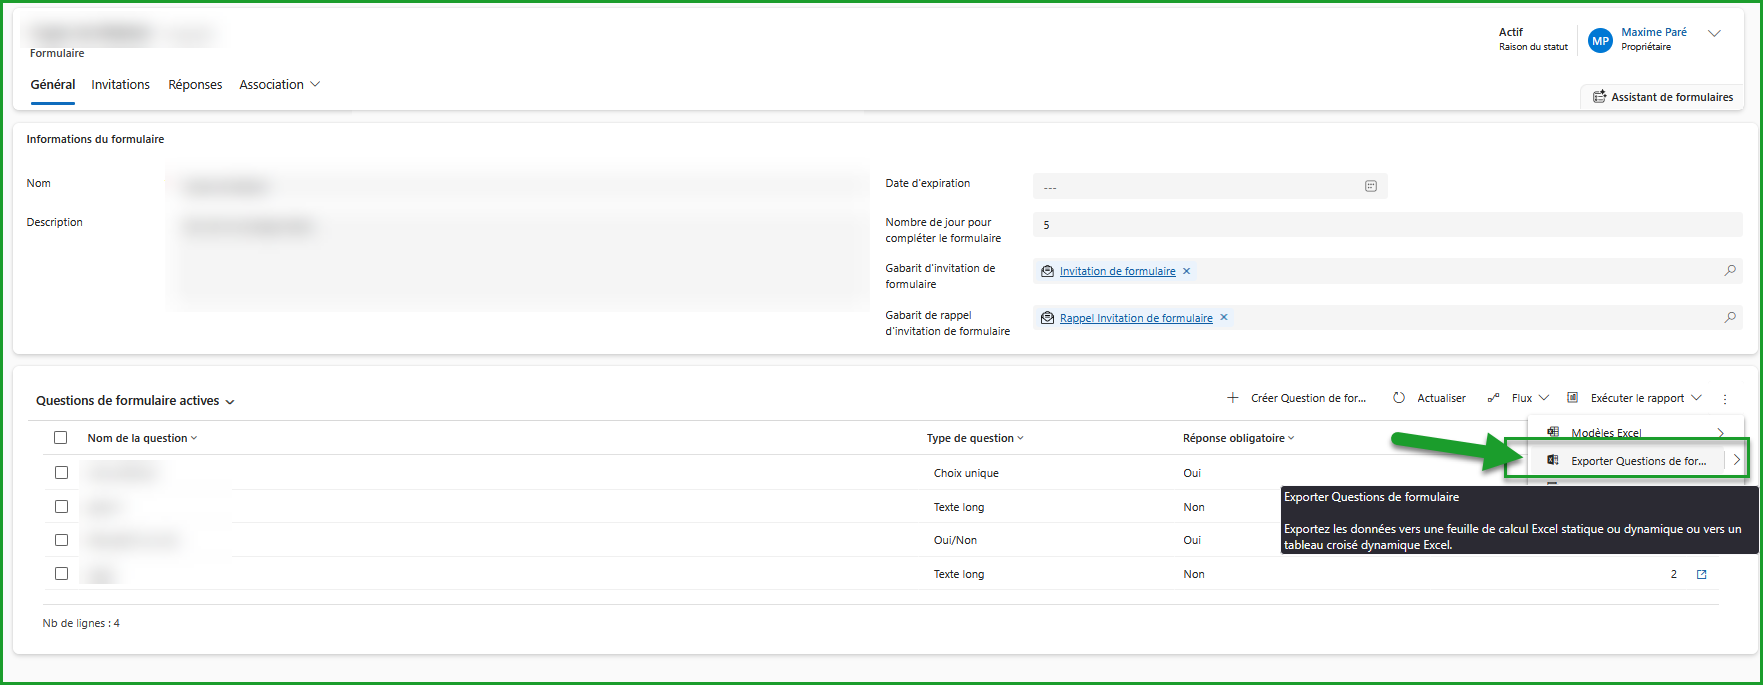
View responses
Responses can be viewed in two ways:
- From the form record (Responses tab);
- From the main menu > Form Question Responses.
Available features:
- 🌐 Real-time results;
- 📃 Export to Excel;
- 🔄 Filter by respondent, question, or date.
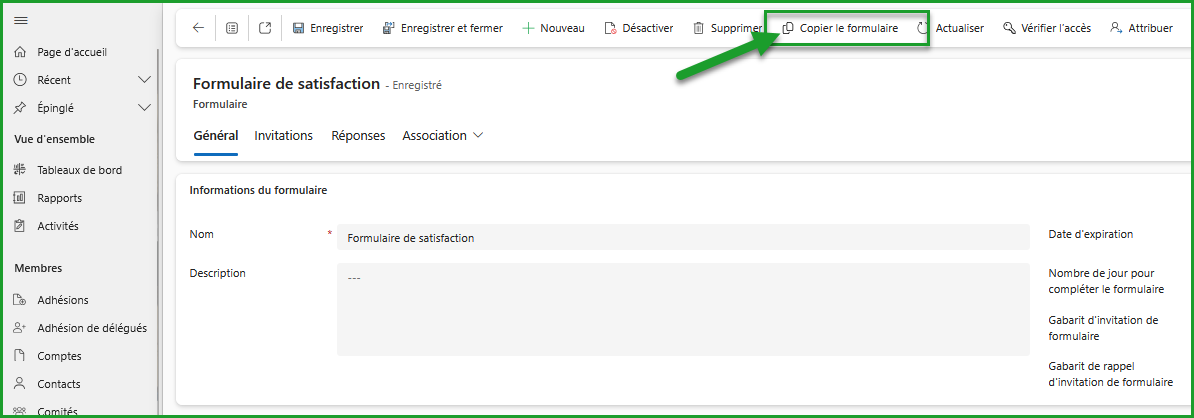
Copy a form
- Go to the Forms section;
- Select the form you want to duplicate;
- Use the
Copy formaction in the toolbar.
Reach out to us — support@vendere.ca