Event Registrations
This section allows you to follow-up on participants who automatically register in your system thanks to the online ticketing system integrated into Membri and to manually register for events on sale.
For registrations made on the online ticket office, registrations, invoices and payments are created automatically.
Create a manual registration
Most registrations are done online through the integrated ticketing, but you can register for any of your current events manually. Take the following steps to get there.
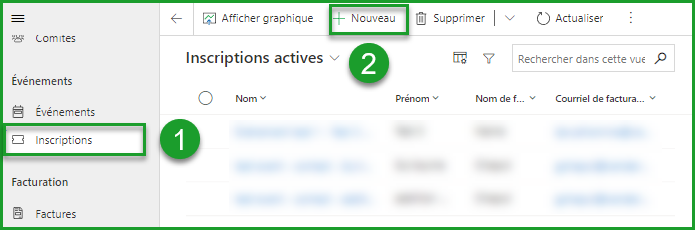
From the Event Registrations section of the main menu (1), open the New Event Registration form by selecting + New in the toolbar (2)
1. Describe the inscription
The Summary tab contains boxes that contain general information about the registration. Complete the required fields and the secondary fields for which you have information.
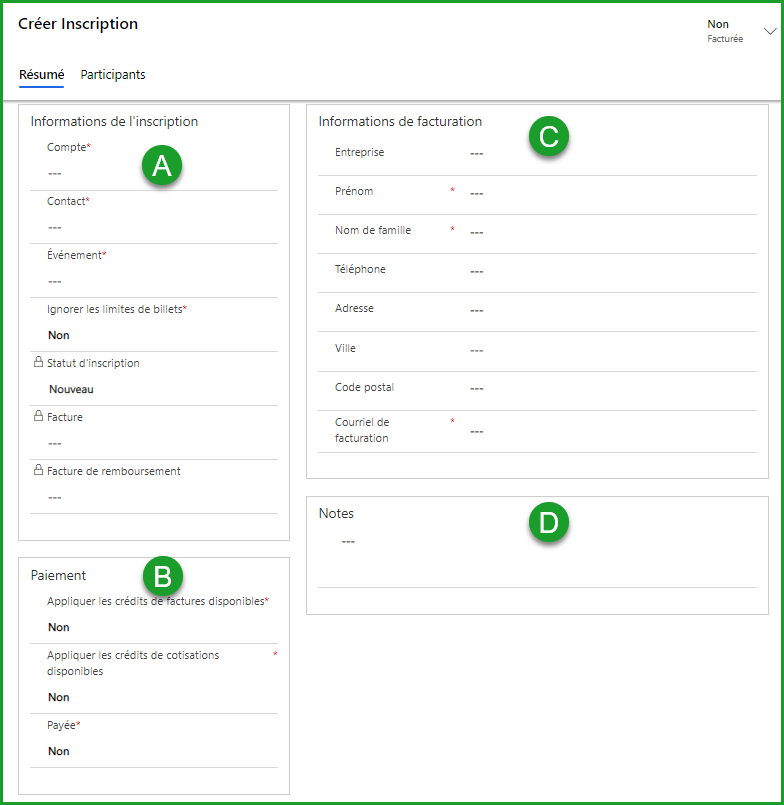
A. Registration's informations box
| Options | Description |
|---|---|
| Contact | Select or create a contact for which you are registering. |
| Event | Select the current event for which you wish to register. |
| Ignore Ticket Limits | This option allows you to bypass the limits you have defined for each type of ticket of your event when creating tickets. |
The Registration status, Invoice and Refund invoice fields are locked fields that will be filled in automatically.
B. Payment box
| Options | Description |
|---|---|
| Apply the available invoice credits | If the contact has a negative balance, you can choose to apply this negative balance as a credit towards attending your events. |
| Limit the taking of credit on invoices | If you register Yes you will be able to limit the maximum amount of this negative balance (credit) that can be used to purchase tickets to your event. |
| Amount of invoice credit taking | Determine the maximum amount you can use. |
| Apply the available contribution credits | Module in development to encourage participation in events |
| Limit the taking of contribution credit | Module in development to encourage participation in events |
| Contribution credit intake amount | Module in development to encourage participation in events |
| Paid | If the registration is paid before billing (eg the person sent you a check along with their registration), set this field to Yes to have Membri send a receipt. |
| Payment amount | Indicate the amount of payment received. |
| Method of payment | Indicate the method by which you received this payment. |
| Payment Details | Enter important information related to the payment (eg check #). |
C. Invoice information box
All the information related to the contact you have selected should automatically appear in the fields of this box.
D. Notes box
You can write notes about registration in general in this box. If the registration contains several participants, you can leave notes on each of the participants in the next tab.
Save registration
To be able to add participants to the registration, you will first need to create it in the system. You must therefore save your progress by selecting Save in the toolbar.

2. Add participants
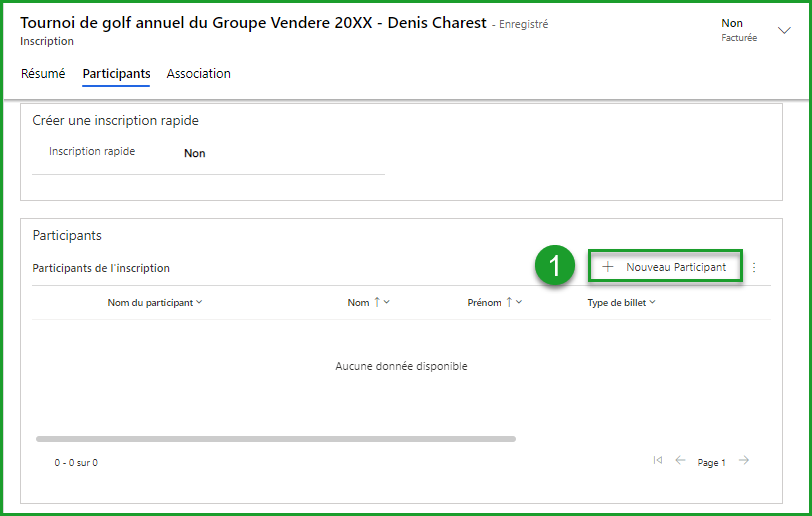
Once the registration is saved, you will be able to see all the options on the participant tab. This tab allows you to add participants to the registration and to note the answers of each of them to the questions related to the activities present on the type of ticket they have chosen.
- Select the option + New participant in the box Participants (1) to open the form New Participant
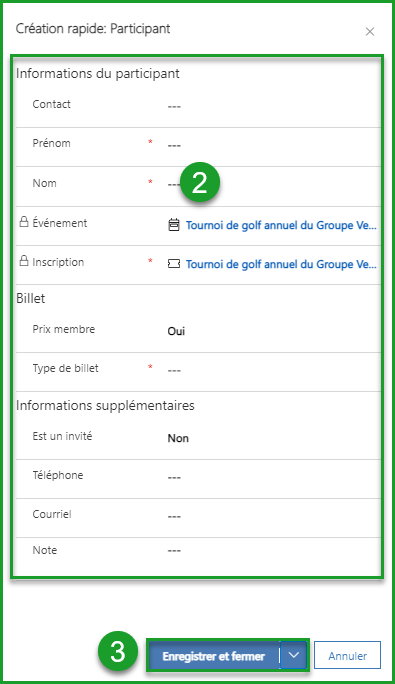
- Using the following table, fill in the various fields of the form (2)
- Save the addition of participant (3)
| Options | Description |
|---|---|
| Contact | Use the magnifying glass to find an existing contact in the database. |
| First and Last Name | These fields are filled in automatically if you select an existing contact. Enter the first and last name of the participant if he is not an existing contact. |
| Event and Registration | These fields are filled in automatically. |
| Member price | Determine if the participant is entitled to the member price. |
| Ticket type | Select the type of ticket to assign to this attendee. If the ticket has a number of participants greater than 1 (table, quartet, etc.), it is necessary to add as many participants as the number indicated on the ticket in order to be able to charge the registration. simplify the task with the next option. |
| Create the other participants of the ticket | This field is only displayed if you have chosen a ticket on which there are several participants. In this case, select Yes for Membri to create the necessary number of participants. You will be able to view and modify them once you have registered the current participant. |
| Is a guest | This field allows you to determine if the attendee is a guest of a contact and to keep this information for your event reports. |
| Phone, email | Enter this information to access it in the future. |
| Note | Add any information that might interest you in connection with the registration of this participant. |
- Repeat steps 1 to 3 until all participants of the registration are added
3. Add participants' responses
Some of your activities may be accompanied by questions for participants. You can enter the responses of each participant manually when you register.
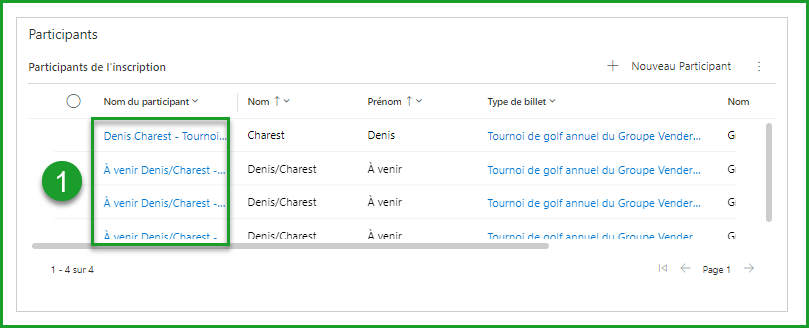
- Select a participant (1)
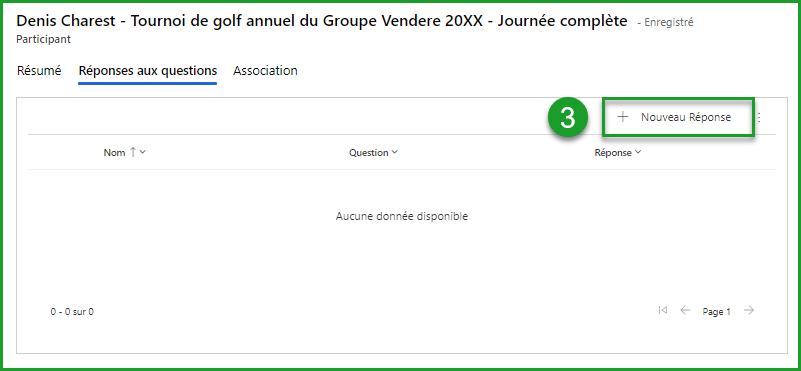
- Select the Answers to questions tab (2)

- Select + New Response (3)
- Search for a question related to this post (4)
- Enter / choose an answer (5) and save it (6)
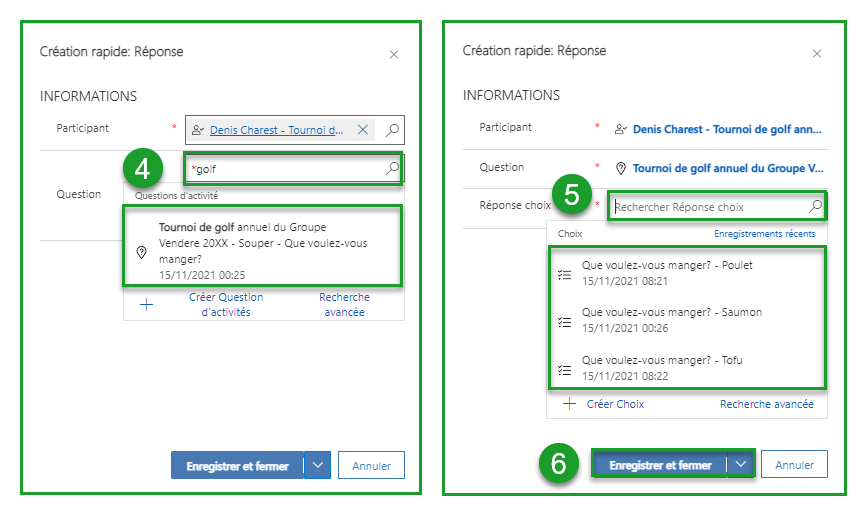
Repeat this process for all other questions related to the type of ticket chosen
Save and close this participant's replies (7)

- Repeat this process for all other participants of this registration.
4. Invoice a registration
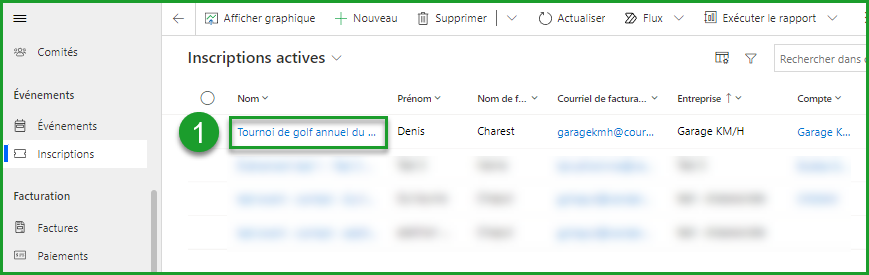
Before proceeding to billing, press the Save button in the toolbar to save the registration (1).
All you have to do is select the option Invoice in the toolbar (2)

The invoice for this registration will be automatically created and sent to the billing contact you designate.
Cancel a registration
When a registration is invoiced, it is possible to cancel it by specifying the percentage of the amount refunded.
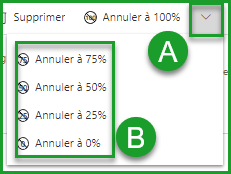
Navigate to the charged subscription. Select it (1) and click the 100% Cancel button in the toolbar to make a full refund.(2)

Partial refund
If you would like to make a partial refund, choose the option that suits you (B) from the drop-down menu by clicking on the arrow just to the right of the button (A).
What's next?
- The reimbursement invoice will be created.
- According to the configured parameters, the main invoice will be canceled and the system will not create a refund invoice
or
- The system will create a credit note to refund or cancel the registration.
Frequently Asked Questions
Why doesn't the number of registrations for an event match the number of participants at that event?
When a person registers online, they can purchase multiple tickets and the tickets can contain multiple participants. For example, a member could register and purchase the following tickets:
2x Ticket - table for six = 12 participants
1x Ticket - individual seat = 1 participant
There would therefore be 13 participants for a single registration. So you will want to export a list of participants and not a list of registrations to prepare for your event. In addition to the list of participants, it is also possible to export a list of answers to questions associated with your activities.
Still unsure? Contact us - support@vendere.ca