Advanced Find
The main menu gives you access to the most relevant tables in the database. Indeed, your daily tasks will lead you to want to consult lists of accounts, contacts, events and invoices to name a few.
However, what happens when you want to query a slightly more secondary table such as Renewals, Memberships, Invoice Products, Contact memberships, or Activity participants? ? Well, you will have to go through the advanced search.
Indeed, the advanced search allows you to search the entire database. From there, it is possible to access most of the tables in the environment, apply filters to them, determine their columns and save the view thus created for reuse later.
Your data is organized by record types:
- Contacts
- Accounts
- Invoices
- Participants
- Etc
All records of the same type are listed in a table. You can consider that each of the rows of a table is a new record and that each of the columns of this table is a different field of the form.
Here is an example of a small contact table that contains 3 records and the form has 5 fields:
| First name | Name | Age | Function | City |
|---|---|---|---|---|
| Sylvain | Thibault | 52 | Human Resources | Repentigny |
| Mary | Thompson | 31 | General Manager | Montreal |
| William | Tremblay | 25 | Advisor | Montreal |
A table is therefore an array/list which includes all the records of the same type and all the values of all the fields of the form of this type of record for each of the records of this type.
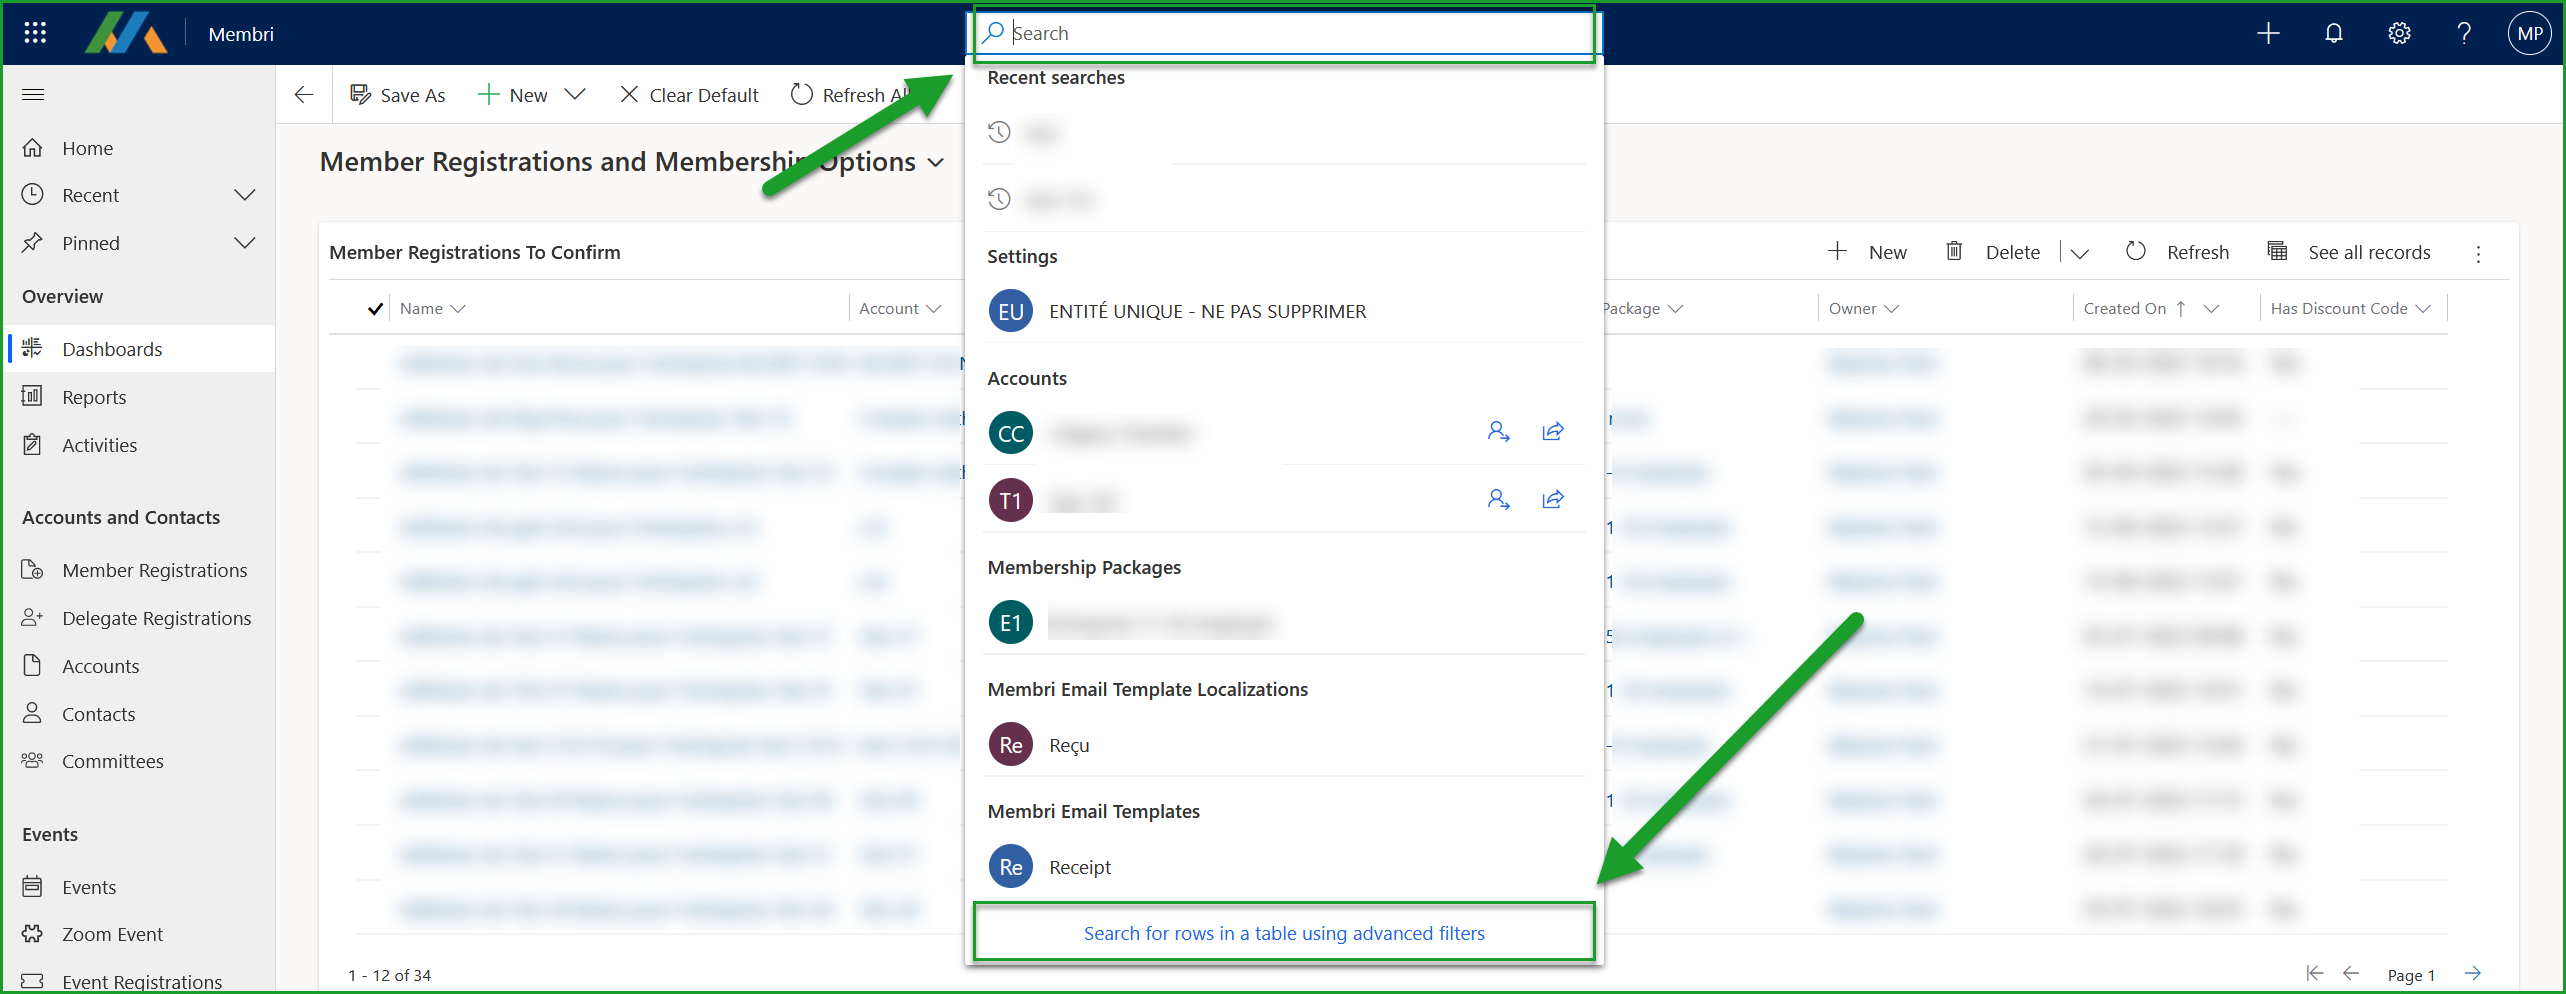
Make a query using advanced search
Choose the table in which to make a query
- Select global search;
- Select
Search for rows in a table using advanced filtersat the bottom of the drop-down menu to use the advanced search;
Advanced search had a different look before. If you were more comfortable with the old search, it is still possible to use it.
- Navigate to the advanced settings of your environment;
- Select the funnel icon to use the old version of advanced search;
- Perform your queries as you did in the past.
To learn more about the changes to advanced search, see our blog post on this subject.
- Choose the table that will be the subject of the query from the list;
- Select
Continue;
Determine which columns to display and apply filters
Once you have reached the table that contains the records of the type you are interested in. Now all you have to do is apply filters to it and determine which columns should be visible.
- Determine which columns should be visible by selecting
Edit Columns; - Apply filters by selecting
Edit Filters;
Save query as new view
Now that the table contains only the records that interest you and that it displays information that you deem relevant, all you have to do is save it as a new view to be able to access it again later.
- Open the view selector;
- Select
Save as new view;
Share your view
Feel free to share it with user teams or with specific users.
- Open view selector;
- Select
Manage and share views; - Determine with which team(s) or with which user(s) you wish to share this view;
- Manage the rights that teams or selected users have on your view;
Find the created view
To have easy access to the view you just created, feel free to go to the Recents section of the main menu and pin it. This way you can quickly consult this view in the future.
To find this view in the future, you will need to use the advanced search to navigate to the relevant table. It will be in the view selector. For example, if you have just created a Renewals view, it will always be possible to return to the renewals table and choose your personal view in the view selector.
Advanced search is relevant for creating views of record types that are not displayed in the main menu:
- Renewals
- Memberships
- Invoice Products
- Etc
Once the table containing the desired record type has been selected, the tools to create the search view are the same as those you regularly use to create views:
- Editing columns
- Applying filters
Contact us - support@vendere.ca