Column options settings
You like system views, but you would like to see a particular piece of information appear on your lists to be really effective. With the Column options tool it is possible to create this view, make it your default view, and even share it with a colleague so that you both are as productive and efficient in Membri.
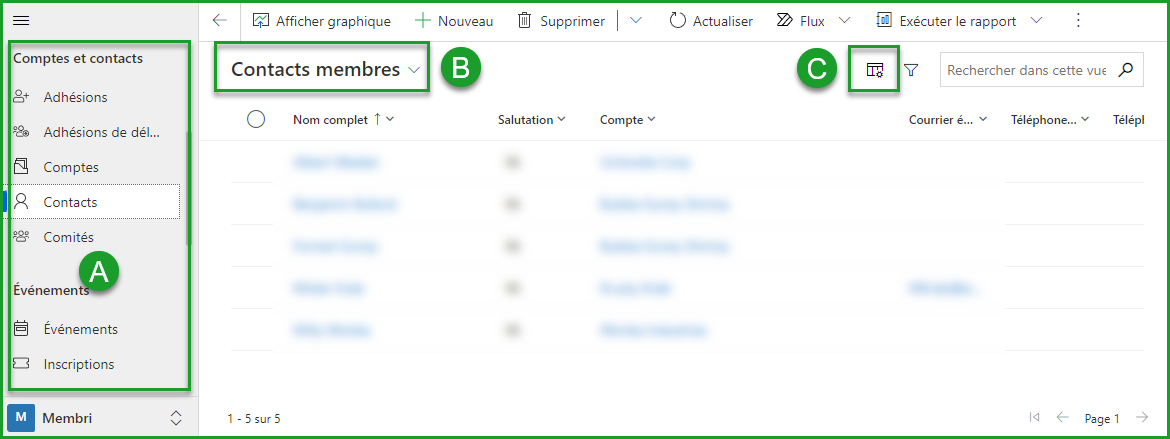
Here is an overview to fully understand this section:
- A. The main menu which houses different types of lists and modules
- B. The view selection menu which allows you to have access to several existing lists and your personalized lists
- C. The Column Options Tool which allows you to customize your lists
Add columns to your lists
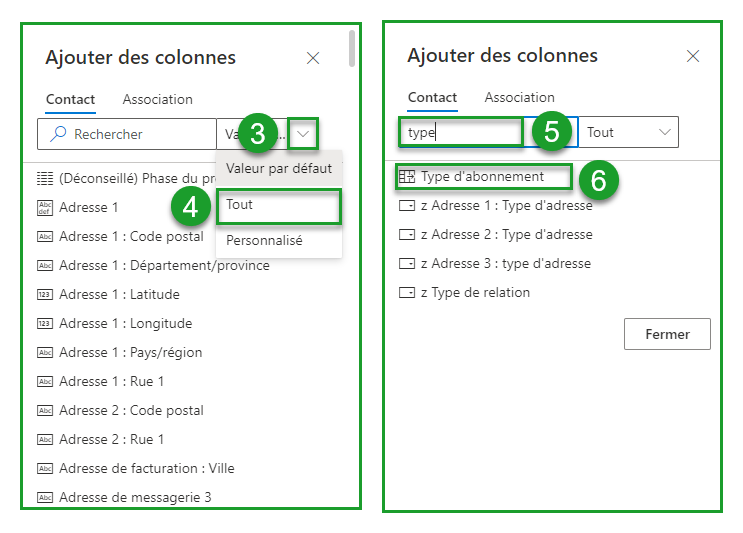
1. Add a column
- Select Column options (1) and select Add columns (2)

- Select all the entities linked to the list (3-4)
- Find (5) and select an entity (6) to make it a column
Which one to add?
You may be hesitant about all the choices available to you. However, don't be afraid to proceed by trial and error. The views you create only remain in the system if you save them.
Do not hesitate to contact our team if you cannot identify which entity to choose.
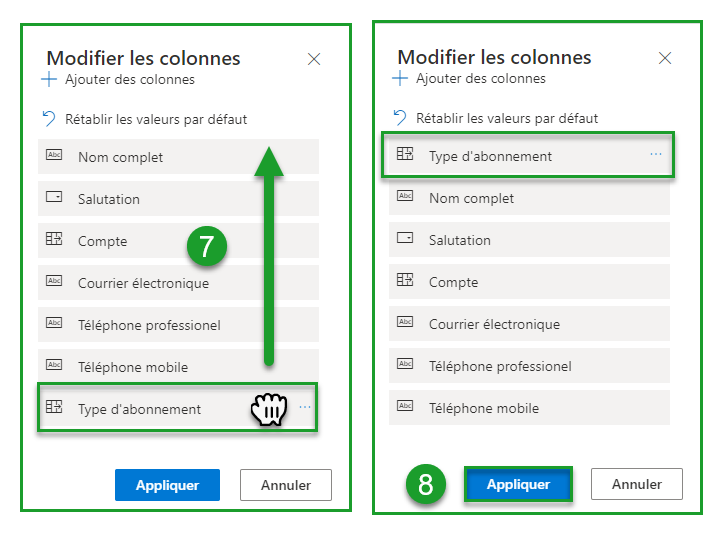
- Rearrange your columns by selecting them and dragging them (7) and Apply your changes (8)
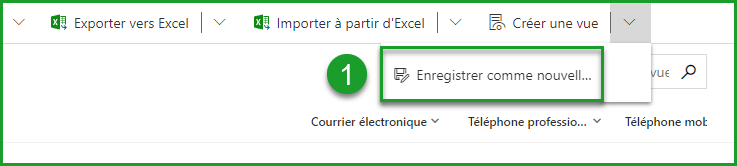
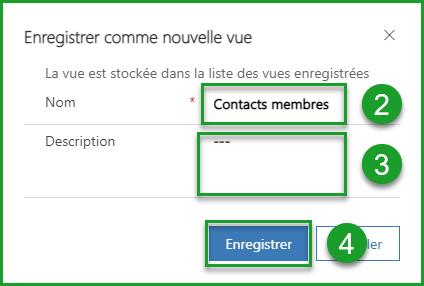
2. Save your view
You have successfully created a new temporary view. However, if you want to come back to it without having to redo all the manipulations of the previous process, you will want to save it.
- Select Save as new view in the toolbar (1)
- Give a title and a description to your view (2-3)
- Save your view (4)
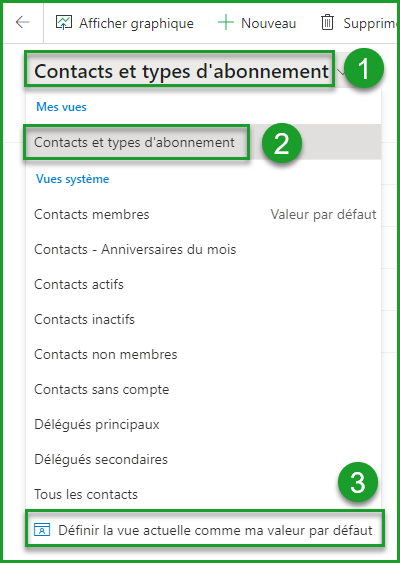
Set a custom view as the default view
Do you always want to get to your custom view first without having to select it from the list of different views? Make sure you have previously selected the view to display by default in the list of views (1-2) and select the Set current view as my default option at the bottom of the drop-down menu (3).
Share a custom view
Want someone else on your team to enjoy one of your personalized views? Of course, you could explain to them how to build the view from their side. However, Dynamics 365 allows you to share a custom view with just a few clicks.
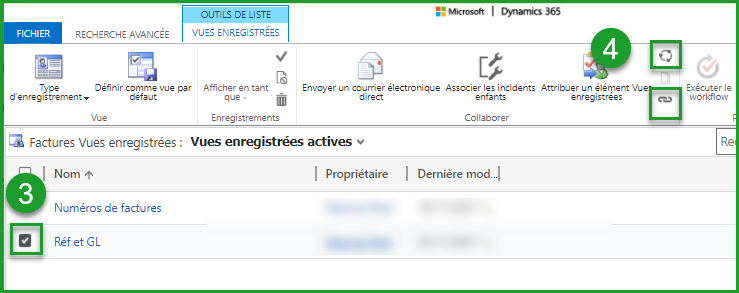
- Select Create a view (1), a new window will open.
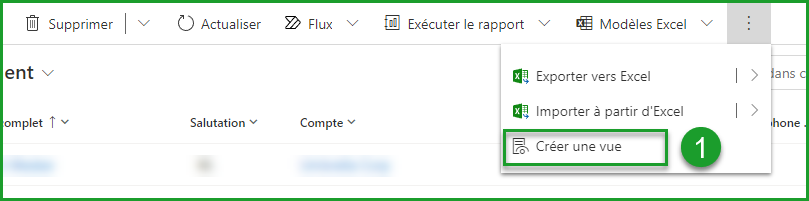
- Select your Saved views (2)
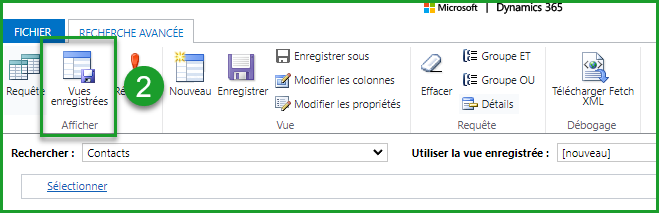
- Check the view to share (3)
- Select Send a link by email or Share (4)
The Send a link by email option allows you to share your view by email to the appropriate people in your organization. If you choose this option, Outlook365 should open and display the link to your view in a new email. All you have to do is enter the email addresses of the members of your organization with whom you want to share your view.
The Share option allows you to choose the people in your organization with whom to directly share the chosen view.
- If the Share option is chosen, identify the people with whom to share this view (5 to 10)
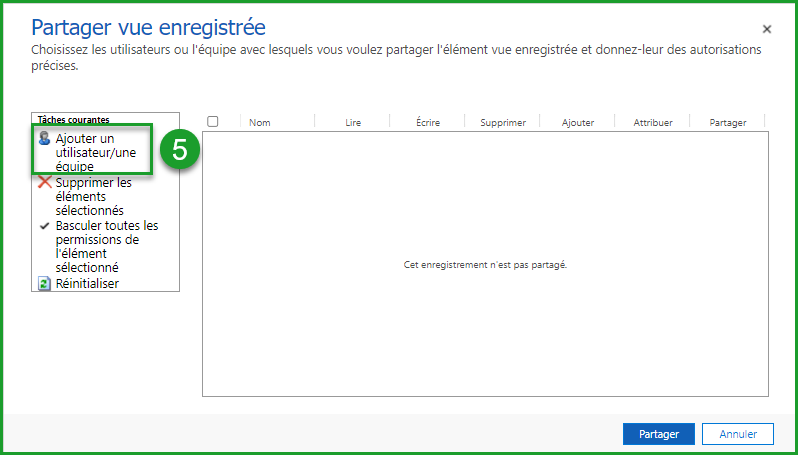
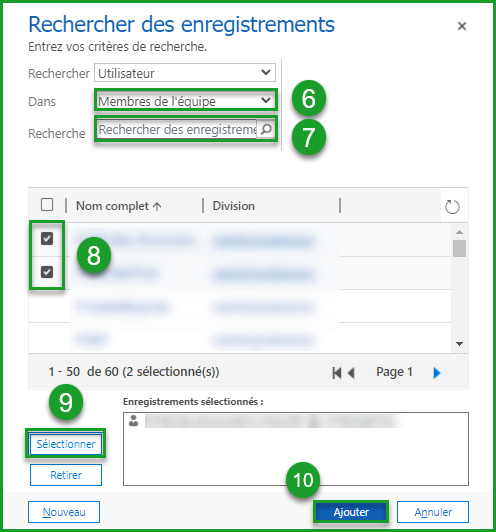
Indicate that you are looking for Team Members and use the magnifying glass to find colleagues more quickly.
- Adjust permissions (11) and select Share (12)
Each box checked is a right that you give over your view to the person with whom you are sharing it.
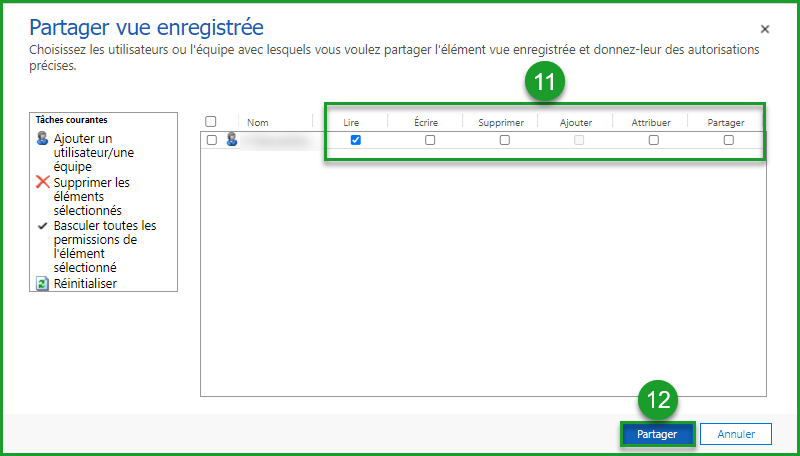
The person you are sharing your view with will need to refresh their environment to have access to it.
Delete a custom view
Have you created a duplicate view? Have you created a view that you no longer need? Whatever the reason, you want to get rid of one of your custom views. Take the following steps to get there.
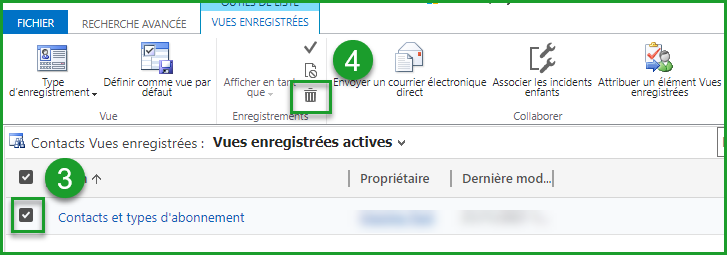
- Select Create a view (1)
- Select your Saved views (2)
- Check the view to delete (3)
- Select the icon Delete saved view (4)
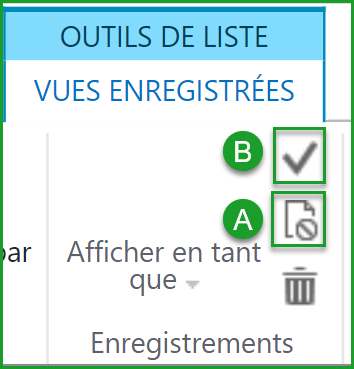
Disable a custom view
You could also make it inactive by selecting the Deactivate icon (A). It will then cease to appear in your list, but you will keep it in the system. When you need it again, go through steps 1 to 3 of the process of deleting a custom view and use the Activate icon (B).
Frequently asked questions
- Section under development
Still not sure? Contact us - support@vendere.ca