Participants
- Create a participant
- Create contact from a participant
- Modify a participant
- Generate participants report
- Export a list of participants
- Export a list of participant responses
- Indicate the presence of participants
- Match participants
- Download a physical ticket
Create a participant
As participants are always linked to a registration. You will first need to create a registration before adding participants.
Create contact from a participant
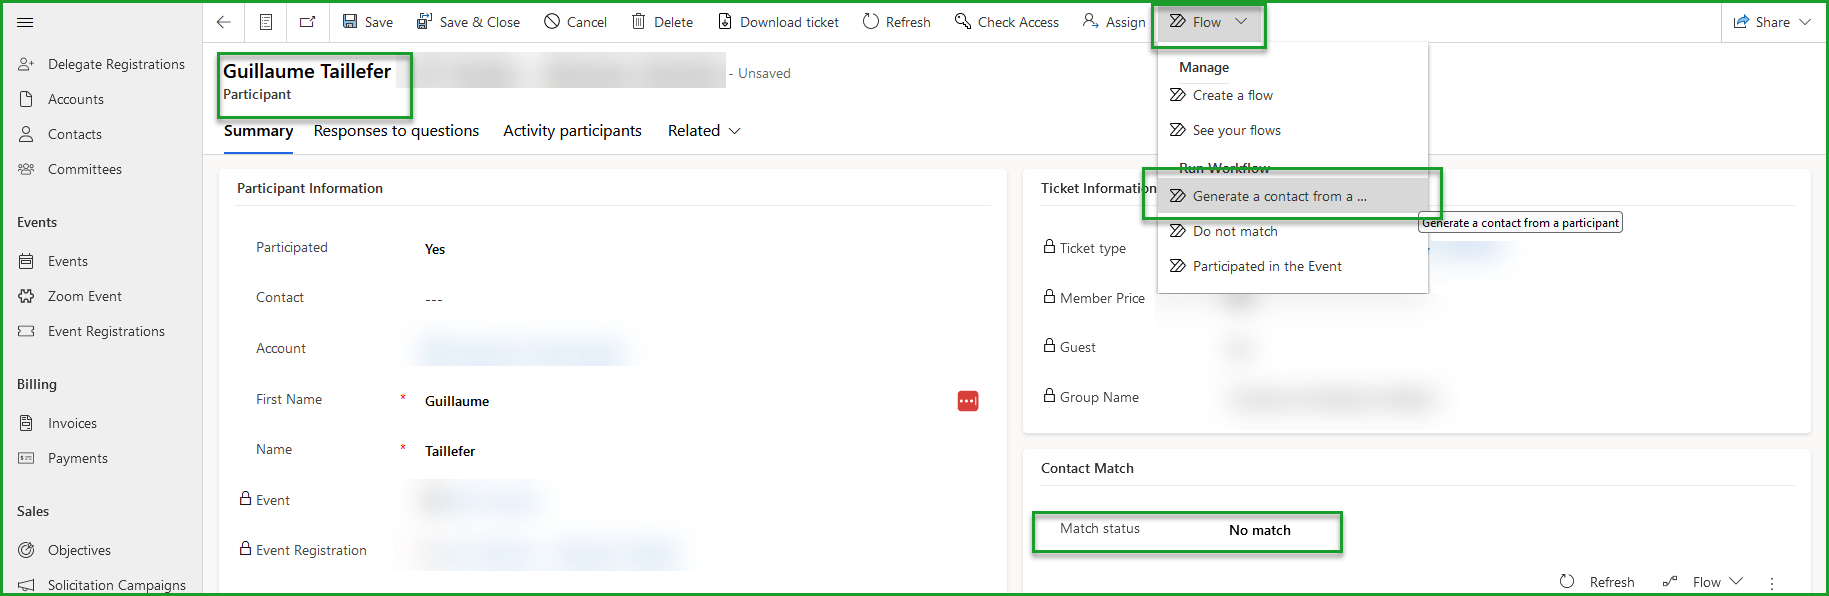
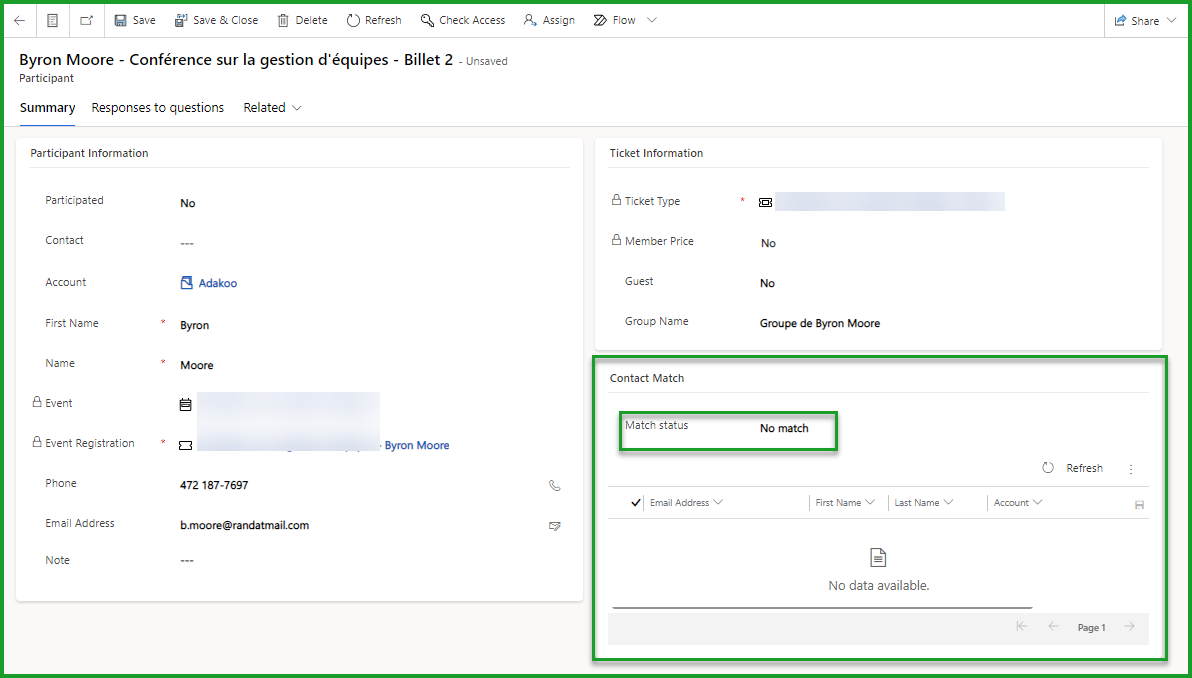
You can create contacts for participants who did not match with a contact in your environment. To do this, use the Generate a contact from a participant flow.
This flow is available on participant lists and participant file.
In order for a contact to be generated, the participant must have a No match status with the contacts of your environment.
A participant with a Partial Match or a Multiple Match status must be paired with a contact manually.
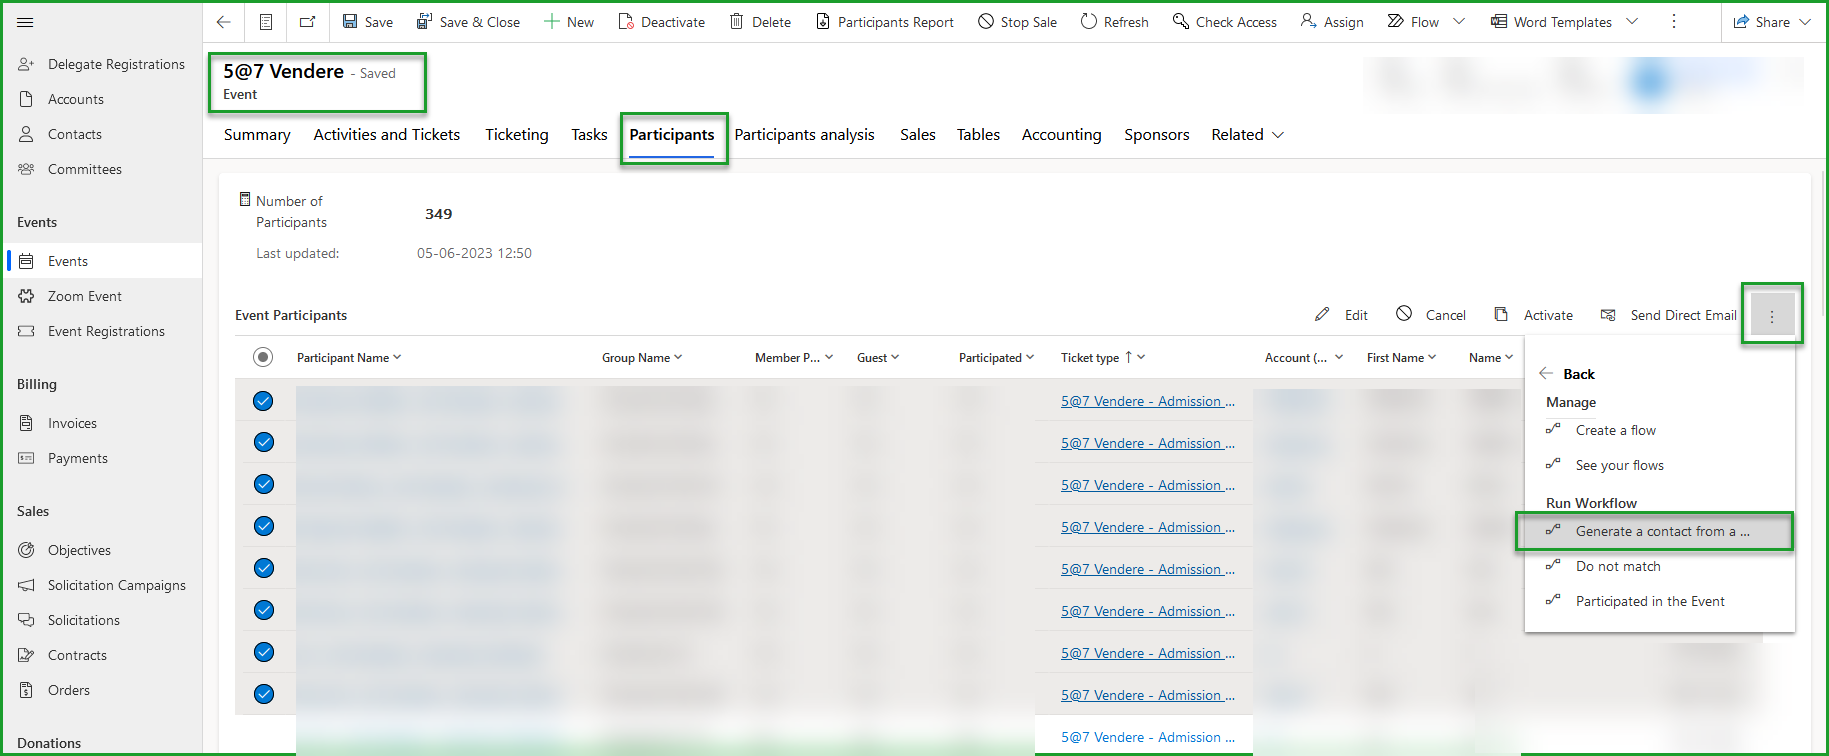
List of participants
- Access a list of participants through an event or an event registration;
- Select the participants from whom you want to generate contacts;
- Select the 'Flow' button;
- Using the drop-down band, select Generate a contact from a participant.
File of a participant
- Select the 'Flow' button;
- Using the drop-down band, select Generate a contact from a participant.
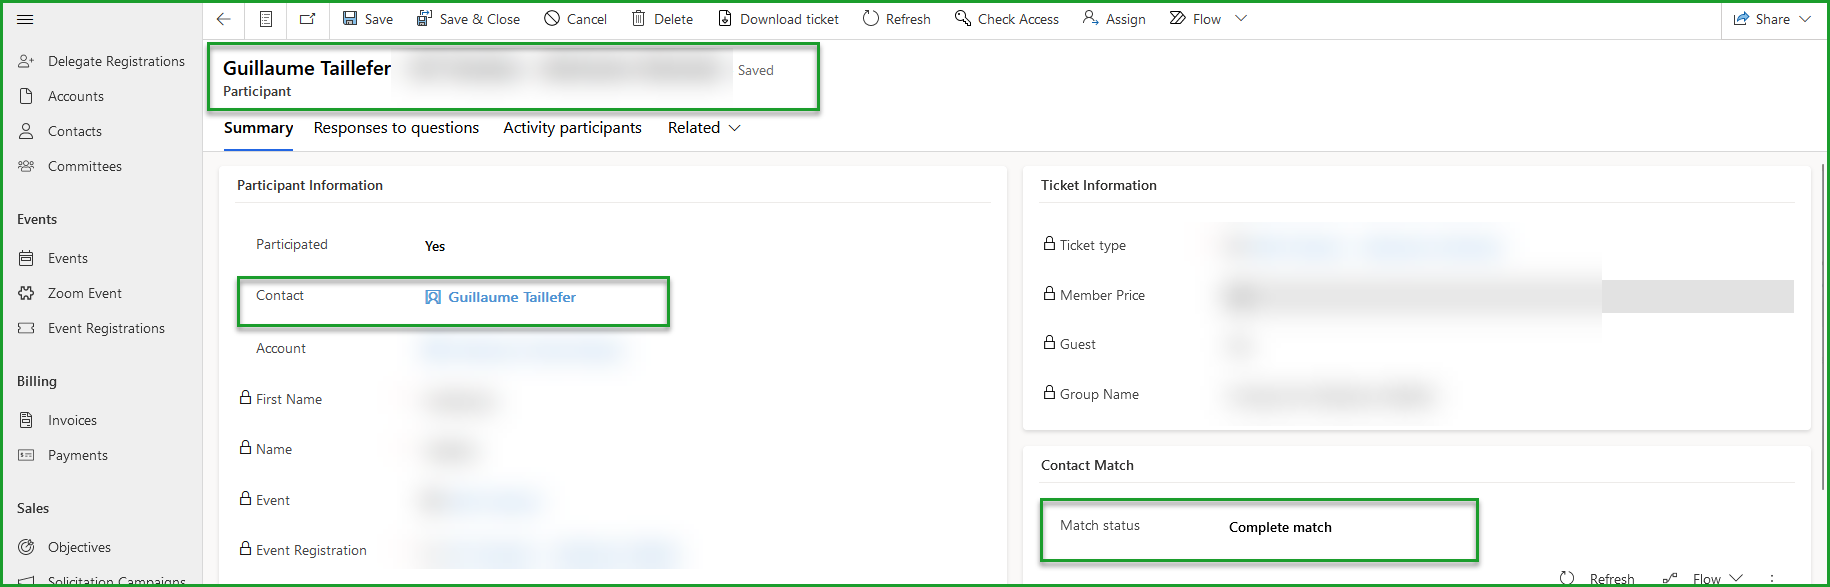
Verify contact creation
You can view the contact that has been created for a participant directly from their file.
Modify a participant
Through the event
- Select the event concerned;
- Select the Participants tab;
- From the Event participants section, select the participant to modify;
- Make changes to the participant form;
- Select
Save and closeto validate the modifications.
Through registration
- Select the registration on which the participant(s) to be modified are located;
- Select the Participants tab;
- From the Registration participants sub-grid, select the participant to modify;
- Make changes to the participant form;
- Select
Save and closeto validate the modifications.
If you want to change the name and first name of a participant through his file, you must first remove the contact associated with the participant.
- Access the participant's file;
- Delete contact;
By going through the URL for modifying the participants of a registration
The advantage of going through this link is to be able to easily and quickly answer questions related to the activities. You can also edit existing responses faster.
- Select the registration on which the participant(s) to be modified are located;
- Select the Participants tab;
- Select the URL found in the Url field for modifying participants from the Participants section
Generate participants report
The advantage of this report is that it contains both the participants and their answers to each of the questions.
- Select the event concerned;
- In the toolbar, select
Participants report; - Open the report from your downloads.
Export a list of participants
From event
- Select the event concerned;
- Select the Participants tab;
- Select
Export Participantsfrom the Event Participants section; - Open the list from your downloads.
From advanced search
The advantage of using this method is to be able to customize the columns and filters applied to the view.
- Select the
Find rows in a table using advanced filtersoption at the bottom of the global search drop-down menu to use the advanced find; - Select the
Participantstable; - Create a personalized view of participants;
- Save the personalized view thus generated if necessary;
- Select
Export to Excelfrom the toolbar; - Open the list from your downloads.
Export a list of participant responses
- Select the event concerned;
- Select the Participants tab;
- Select
Export Answersfrom the section Answers to questions; - Open the list from your downloads.
Indicate the presence of participants
Directly on a participant's file
- Select the event concerned;
- Select the Participants tab;
- Select the participant concerned;
- Indicate Yes in the Participated field;
- Select
Savefrom the toolbar.
It is possible to select a participant and open the recordset to save you unnecessary clicks.
You can conjugate recordset and shortcut CTRL+F
Through Excel Online
- Select the event concerned;
- Select the Participants tab;
- From the Event Participants sub-grid, select
Export Participant to Excel Online; - Make changes to the necessary fields;
- Select
Save.
Multiple users can make changes via Excel Online simultaneously. At the time of import, only the records that have been modified will be updated. This implies that there should be no conflict if users are editing different participant records.
Changes will not be made instantly. The data will be imported and edited. You can track the import if you wish.
By scanning physical tickets
If you have configured physical ticket creation for your event. You can scan the QR codes on participants' tickets using our application for this purpose.
Match participants
By default, participants on non-member listings will need to be matched with CRM contacts.
Of course, if you don't want to match participants and contacts, it is possible to configure your environment so that non-member participants and the registrations they appear on are assigned to a default account and contact.
The advantage of matching participants is, ultimately, to easily identify potential new members (non-member accounts or contacts who have participated in events).
- Navigate to the Dashboards section of the main menu;
- Select the Participant Match dashboard;
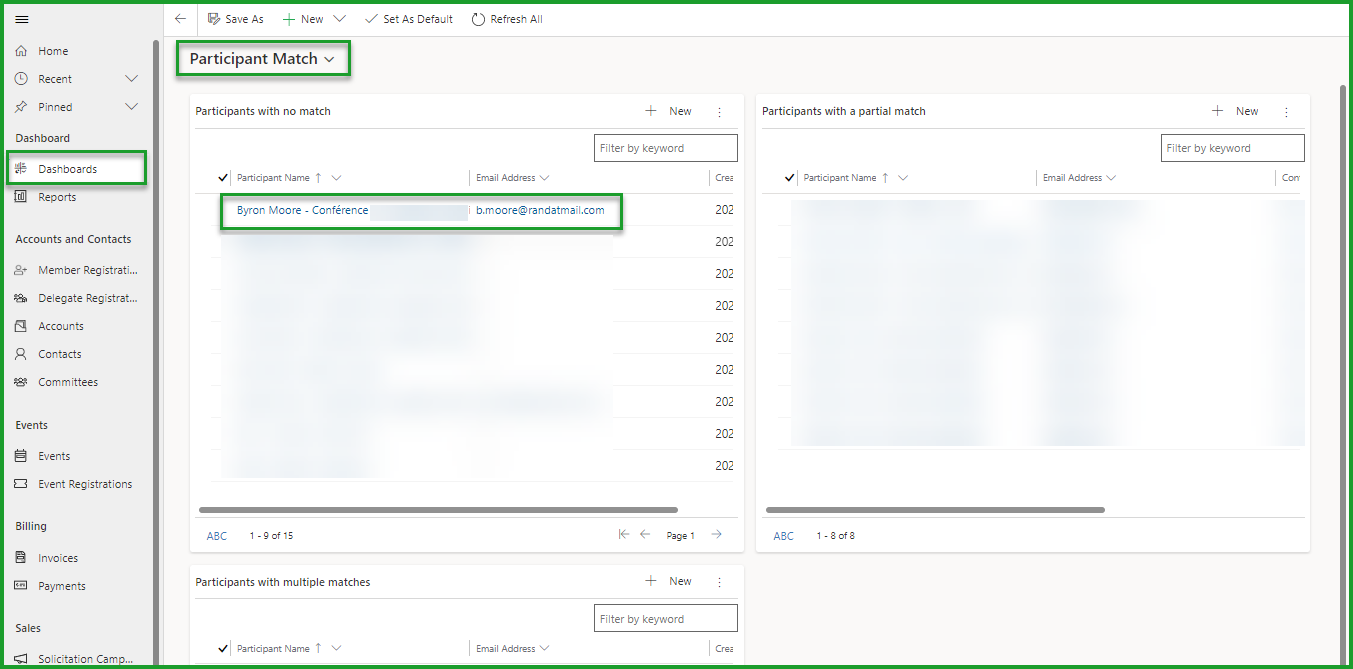
- Select a participant to be matched;
- Check the participant's match status and take necessary actions.
The actions to be performed vary slightly from one match status to another.
| Match Status | Operations to be performed |
|---|---|
| No Match |
|
| Partial match |
|
| Multiple Match |
|
Download a physical ticket
If you generate physical tickets for your event, you can download attendee tickets.
If you decide to download tickets through the event registration, all tickets related to the chosen event registration will be downloaded. However, you can access the file of a single participant and download only this ticket.
Download a single participant's ticket
- Access the participant record through the event or through the event registration;
- Select the 'Download ticket' button.

Contact us - support@vendere.ca