Member Registration
This section is for the new member registration process. You don't recognize the first few steps? Check the older process.
Still not sure? Contact us - support@vendere.ca
The Memberships option of the menu allows you to add new member accounts to Membri. To create a new member account, it is absolutely necessary to go through a membership.
If you wish to add a non-member account, the account must be created directly from the Accounts option of the menu. Then follow the process of adding a non-member account.
Registering a member
The membership process for a member account will guide you through the following steps:
- The creation or selection of a member account
- The creation or selection of a main delegate for the member account
- Selecting the type of membership and its terms
- Saving your progress
- Adding secondary delegates
- Billing
1- Create or select a member account
Opening of the membership form
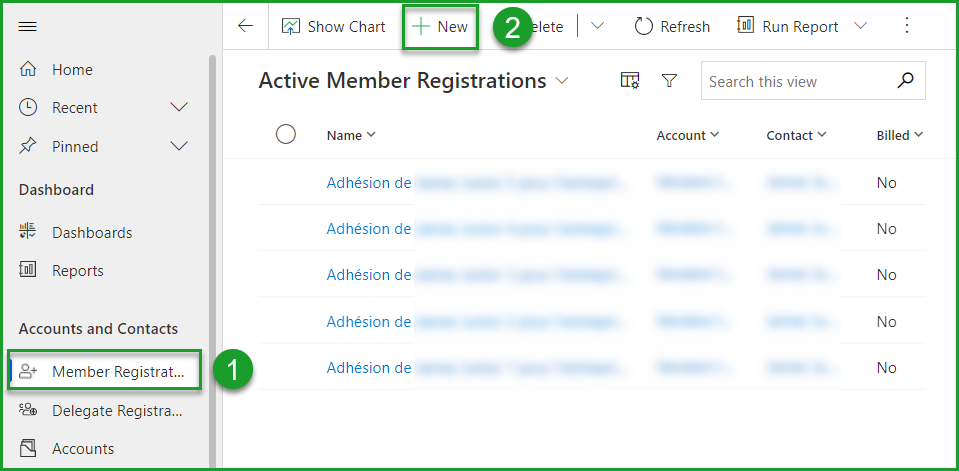
To open the membership form, first go to the Memberships section of the menu (1) and click + New in your toolbar (2).
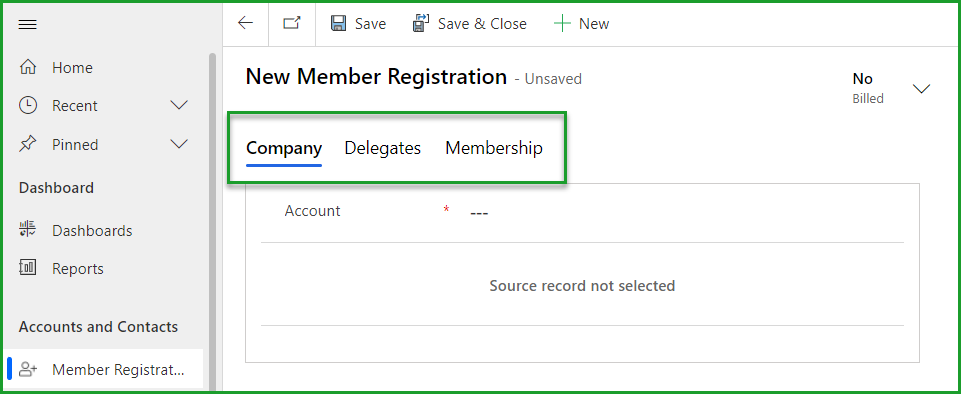
You should see a new section with the title Create Membership. Under this title, you will see three tabs: Company, Delegates, membership. Membership will not be complete until you have completed the forms under the 3 tabs.
Selection or creation of an account
- Creation of a new account
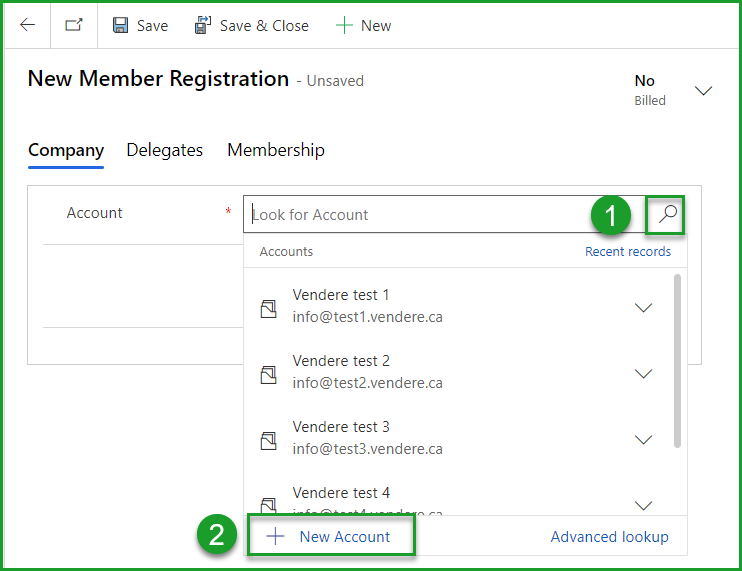
Most of the time, a new membership will require the creation of a new account. To do this, select the + Create Account option at the bottom of the drop-down menu.
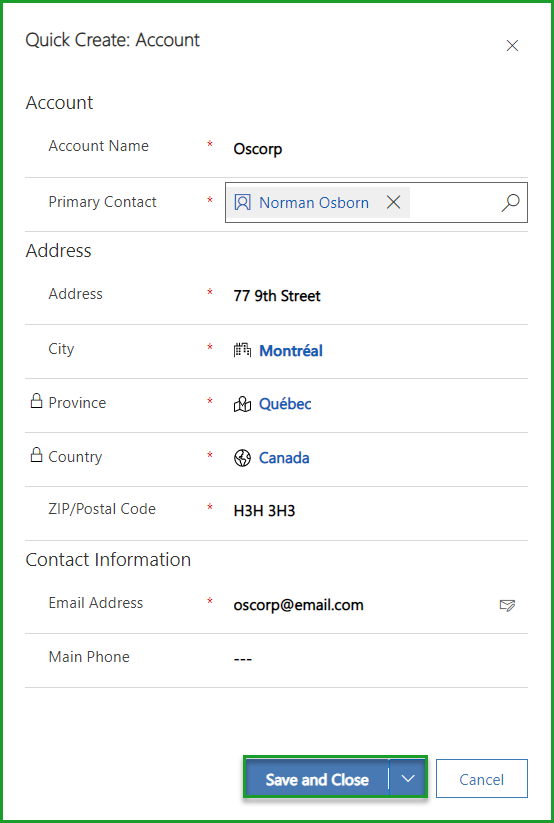
The Quick Creation: Account form should appear on the right of your screen. Fill in the account information for each of the mandatory fields of the form. Then complete the secondary fields for which you have information.

Champs obligatoires
Fields marked with a red asterisk must be completed to access the next step in all Membri processes.

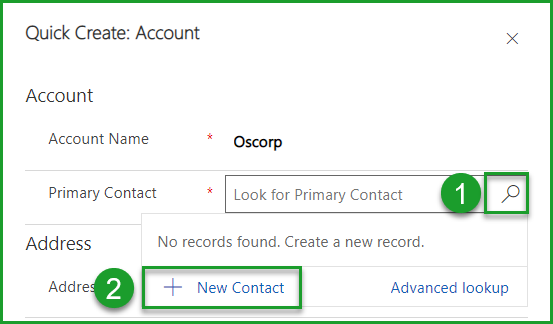
You will then notice that a new account must be linked to a primary contact. You will then have to select or create a primary contact in a new quick form. This procedure is covered in the next section. Fill in the other mandatory fields of the account creation form.
List of cities
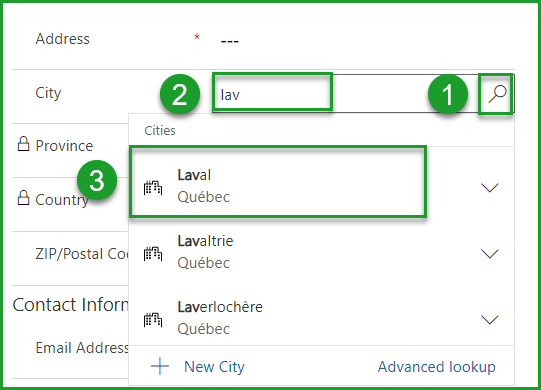
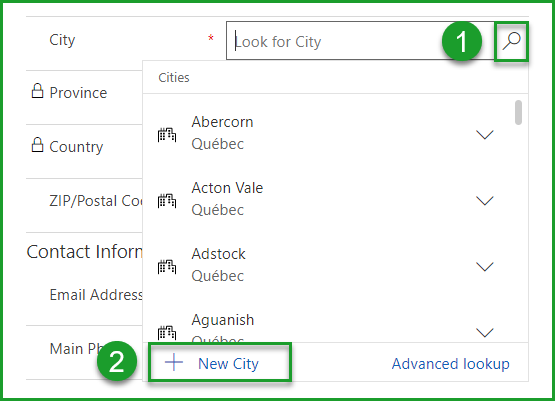
Membri contains a database with all the cities you should be interested in. To access it, all you have to do is click on the magnifying glass to the right of the City field. Type the first letters of the name of the city where the account you are joining is established and select it from the drop-down menu. Once you have made your selection, the Province and Country fields should automatically fill out.
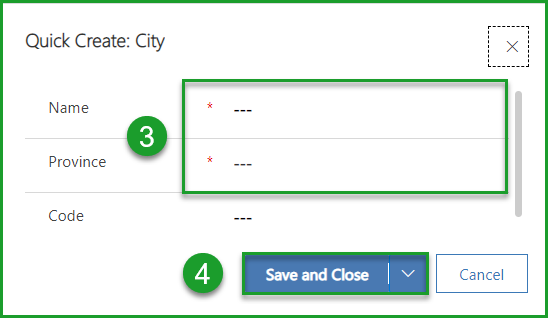
If the city you are looking for does not come up, you can create it by pressing the Create City option at the bottom of the drop-down menu. Another form named Quick Creation: City should appear. Fill in the required fields and press the Save and Close button at the bottom of the form.
- Selection of an existing account
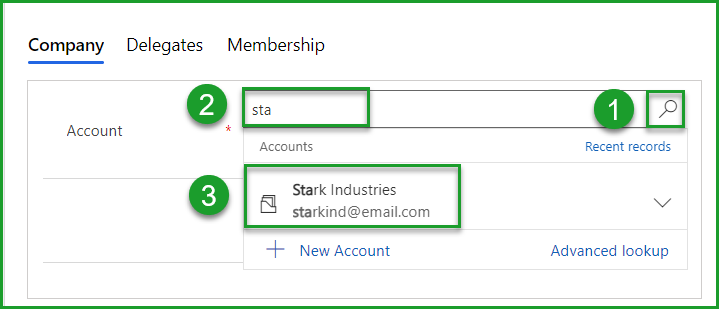
In case you are filling membership application for an existing account in your CRM, press the magnifying glass icon to the right of the search bar of the field and enter the first letters of the account name to be able to select it.
Selection or creation of a main contact
- Creation of a new contact
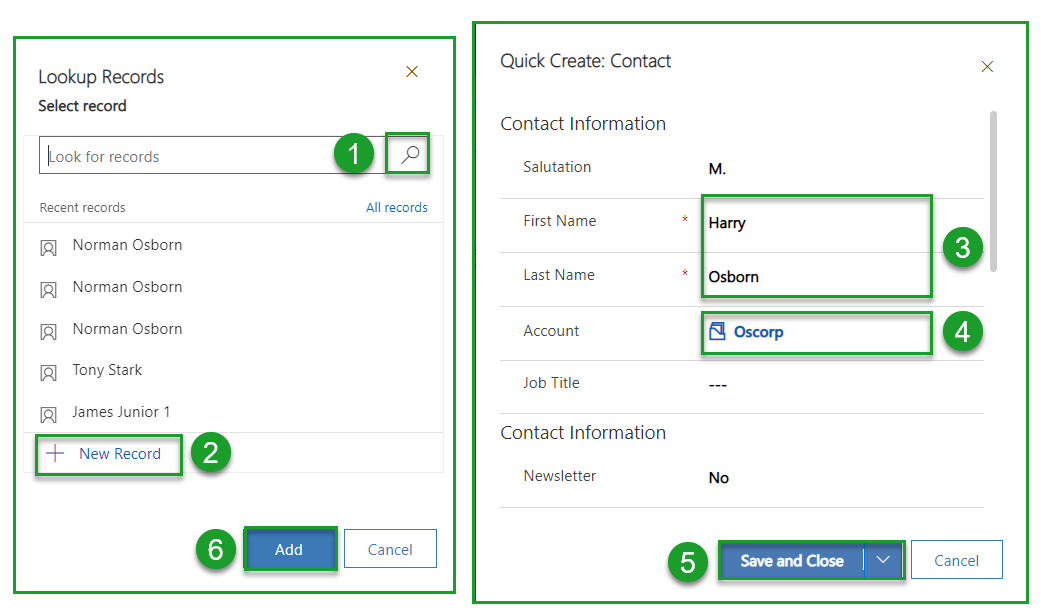
Most of the time, a new account will require the creation of a new contact. To do this, select the + Create Contact option at the bottom of the drop-down menu.
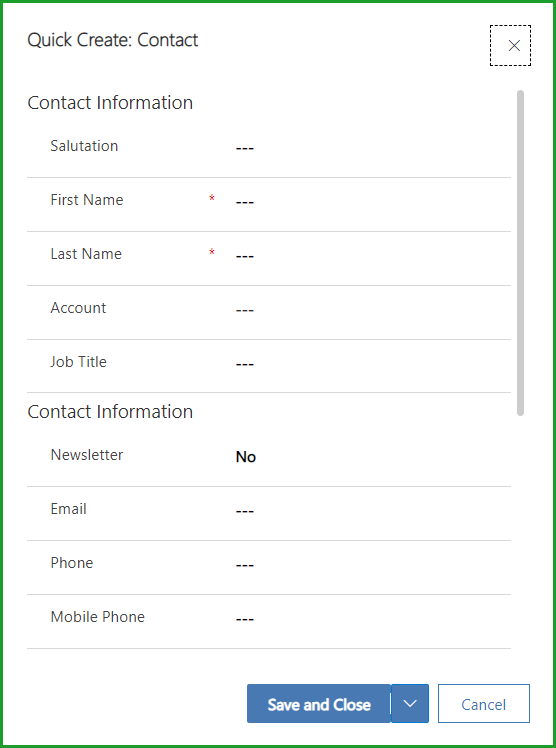
The Quick Create: Contact form should replace the Quick Create: Account form. Fill in the contact information for each of the mandatory fields. Then complete the secondary fields for which you have information.
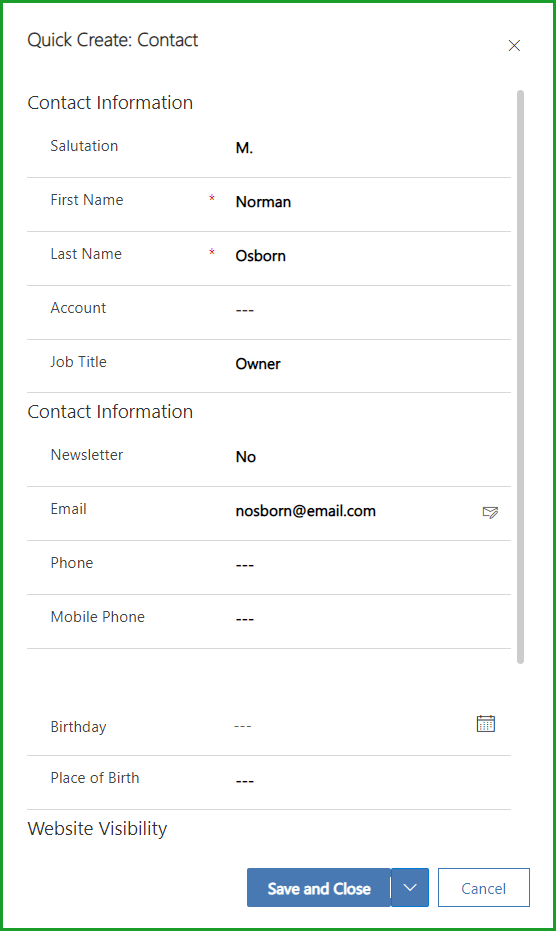
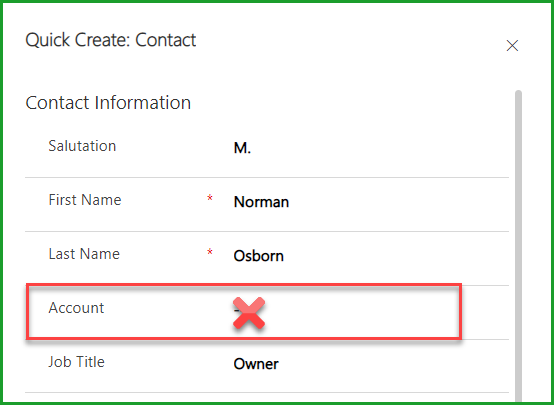
Please note that you do not have to fill in the Account field.
Since you are in the process of creating an account and a contact, the two will be automatically linked later. Additionally, you will not be able to find the account for which this contact is the primary contact in the search bar because you have not yet returned/saved the first quick form Quick Create: Account.
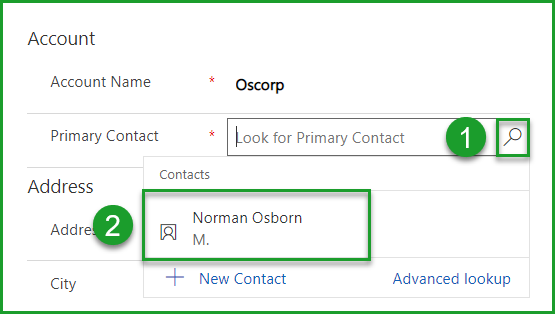
- Selection of an existing contact
In case the account you are joining has an existing contact in your CRM, press the magnifying glass icon to the right of the search bar of the field and enter the first letters of the contact's name to be able to select it .
After making sure that both forms are completed correctly, press the Save and Close button found at the bottom of both forms.
2- Create or select a main delegate
Appointment of the main delegate
All forms associated with the Company tab of the registration process should be complete. You are now ready to move on to the second tab, that of Delegates.

This tab allows you to associate a contact as the main delegate of the membership. You can also add secondary delegates to it.
Selection of the main delegate
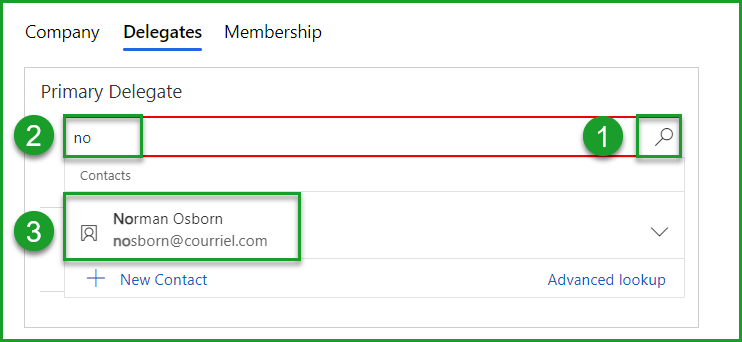
To add a primary delegate, click the magnifying glass in the search field and search for the contact you want to assign as the primary delegate.
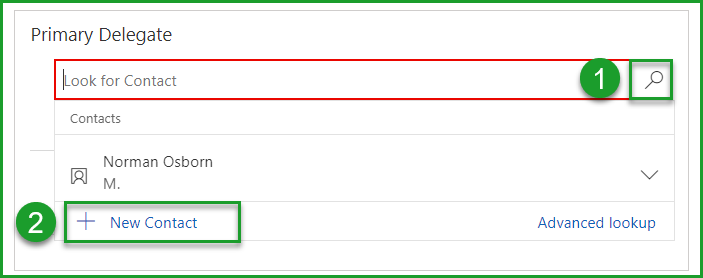
Creation of the main delegate
In case the main delegate is not the contact you created when creating the account on the previous tab, press the + Create Contact option at the bottom of the drop-down menu. You can then create a new contact from a quick form.
It is not yet possible to add secondary delegates at this step. Don't worry, this functionality will be possible after the fourth step (Saving your progress) of this process.
3- Select the type of membership and its terms
You are now ready to move on to the third tab of the membership creation process. This tab will allow you to last the type and terms of membership of the new member account. To do this, click on the membership tab.

Definition of the member's membership
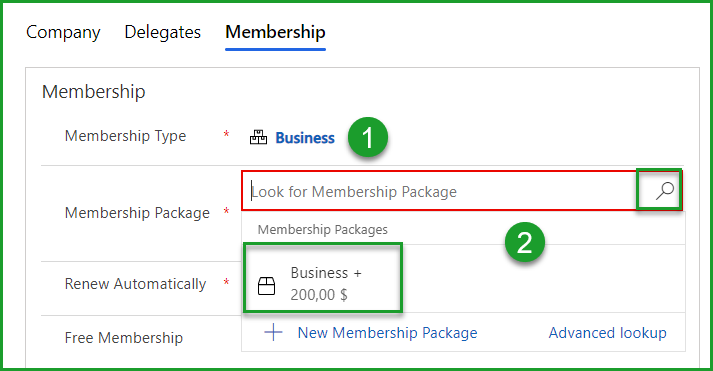
First, in the search field membership type, click on the magnifying glass and choose the membership that suits the account you are joining.
Then, in the search field Membership packages, click on the magnifying glass and define the option chosen for the new member account.
Ideally, all membership types and all of your membership packages have been defined during the Membri implementation phase with our team. However, you may need to create a new membership type or add options to it.
To reach these forms, select the option + Create membership Type at the bottom of the drop-down menu in the membership type field or the option + Create membership package at the bottom of the drop-down menu in the Set of membership packages field.
Definition of terms around the member's membership
It is possible to modify several terms around the membership. Choose those that are relevant to the account you are registering (Yes) and reject those that are not (No).
| Terms | Description |
|---|---|
| Automatically renew | This option tells Membri that the renewal of this membership will be done automatically. This implies that when the membership expires, an invoice will automatically be sent to the contact at the previously designated email address. The main contact will then be able to pay this invoice if he does indeed wish to renew his membership. |
| Free membership | This option allows you to offer a free membership to the account you are joining. For example, the new member could be the winner of a contest or have already paid for their membership in your old system. |
| Apply the file opening fees | This option allows you to apply or credit the fees for opening a new file to the new membership you are completing. Maybe the account already existed in your old system or maybe this account has been a member before? In these cases, this field might indate No. These opening fees should have already been configured in the membership package . |
| Apply the new business discount | If you select this option, a discount that you configured when implementing Membri will be applied to the invoice for the current membership. This discount should have already been configured in membership package . |
| Predetermine the end date | This option will allow you to indicate when the account membership should end. This will tell Membri when to send emails related to the renewal. Most of the time, memberships are annual, but for several reasons the membership for the account in question may end later or earlier. For example, we can think of different agreements that you could have made with your members regarding the exceptional circumstances brought forth by the pandemic. Please note that if Membri is configured to automatically fix the renewal date, the membership end date will be automatically filled. |
| Type of pro-rata adjustment | This field is only available if you have specified an end date for the membership. Membri then offers you to make an adjustment on the invoice for the member account. For example, if all memberships are annual and need to be renewed on a fixed date and you have a new member four months before the membership term ends, you will only want to charge them one-third of the cost of the membership. If you choose Automatic, Membri will calculate the amount to be billed. If you choose Amount, you will have to enter the amount to be invoiced in the field that will appear after it. |
| Paid | Membership may already have been paid for. For example, your primary partners may not be using a credit card to pay for their membership. Let's say they instead wrote a check. In this case, it is possible to indicate the amount of this payment, the mode as well as important details (the number of the check for example). |
| Block sending of the invoice email | By activating this option, the process of automatically sending an invoice will be blocked. This will allow you to validate, modify the membership before sending or not to send anything at all in the case of a free membership for example. |
| Message on the invoice | You can write in the following field a personalized message for the account you are registering. For example, when you receive a membership directly from your website, you will have to validate it. If there are any errors in the membership application, you can correct them and indicate what you have corrected in a personalized message. You could also write a personalized welcome message on a new customer's invoice. |
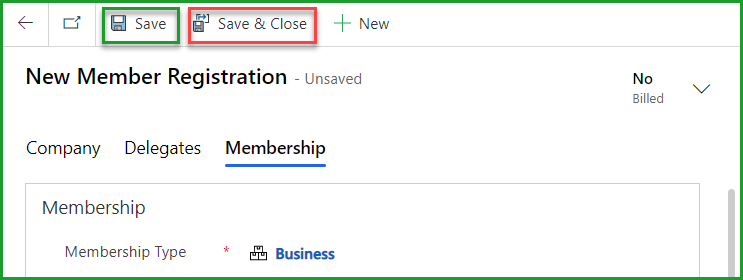
4- Save your progress
Why save?
At this time, the information you entered in the forms is temporary. Registration will allow Membri to enter all of this information into your system. This will also allow you to access features that were previously locked. One of these features is the ability to add secondary delegates to the new member account.
How to save
To proceed with saving your progress, select the Save icon in your toolbar.
The Save and Close option is not optimal here as it will take you back to the main menu of the Member Registration section. Of course, you will still be able to access the membership you are working on by selecting it from the menu list.
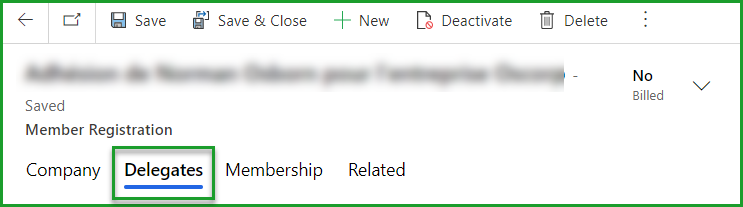
5- Add secondary delegates
Return to the Delegates tab
If you want to add secondary delegates to the membership of the new account you are joining, select the Delegates tab. If you do not want to add a secondary delegate to the membership, go directly to step 6 (Billing) of this process.
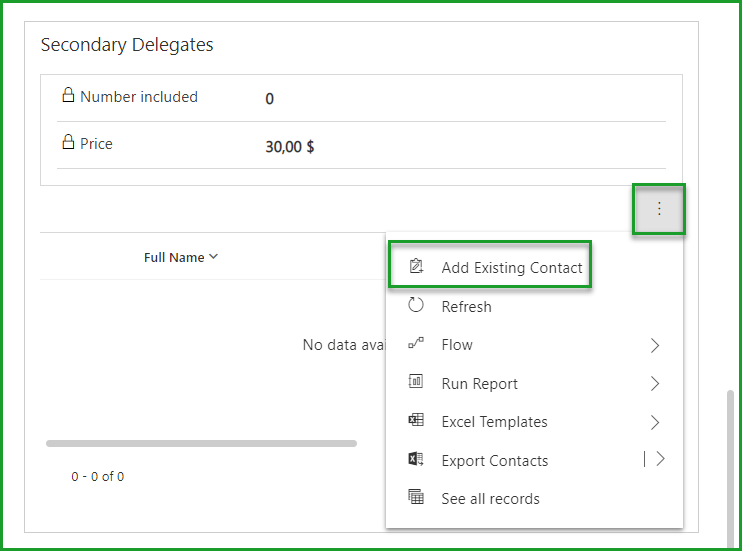
Adding and creating a secondary delegate
Select the Add an existing contact option in the Secondary delegates box.
• If the contact is an existing contact, select the magnifying glass and find the contact to register as a secondary delegate.
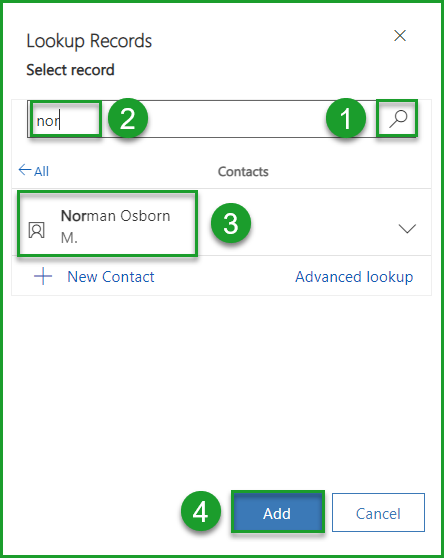
• If the contact to add is not in your contact list, select the +Create Contact option at the bottom of the drop-down menu. The Quick creation: Contact form will appear and you can follow the same procedure as when creating a new main contact with the only exception that you can now choose an account to associate with this contact since you have already created it.
Your monitor / screen may be too narrow to display the Add an existing contact option. In this case, you can still access it by selecting the three dots in the Secondary delegates box.
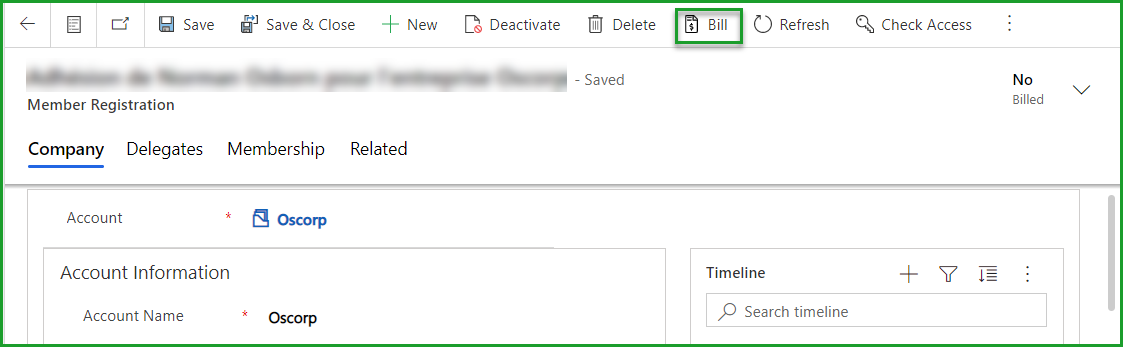
6- Send an invoice
You are now ready to bill the new member account.
• Select the Invoice icon in your toolbar.
What's next?
• A membership fee pending payment is added to the account and the account will remain non-member until payment of the invoice.
• An invoice will be automatically created and sent to the customer (or pending transfer to the accounting system (depending on the parameters).
• It is also possible to manually pay for a membership.
Reset the registration
If you made a mistake on a billed membership, but it is not yet paid, you can reset the registration to make the necessary changes. You will need to select the Reset icon in your toolbar. The membership will then be removed and the invoice will be canceled.

Registrations from your website
Registrations that originate from your website will go directly into Membri. However, the registration process is not complete. There are two logical reasons for this:
On the one hand, it allows you to know that you have a new account that wishes to be a member. You can then take the necessary actions to welcome this new member account within your organization.
On the other hand, it is possible that errors have slipped into the membership application. For example, it could be that a new member chose the wrong type of membership. Once the request has been verified, make the necessary changes. You can indicate which changes have been made by adding a custom message directly on the invoice.
Now all you have to do is invoice.
Frequently asked questions
- Section under development
Still not sure? Contact us - support@vendere.ca